
Clone With Confidence: Our Complete SOP
This is what works for us, not the only way—just our way. Every grower will find their own path. Here’s ours.
Before You Cut: Mother Plant Prep
Make sure your mother plant is well hydrated—water her the day before cutting or at least several hours before you take cuttings. A hydrated mother gives you stronger, healthier cuts.
Step One: Immediate Hydration
After taking cuttings, place them in a red cup or container with our nutrient recipe to achieve maximum turgidity. Let them sit for two to four hours before proceeding.
Hydration Solution Recipe:
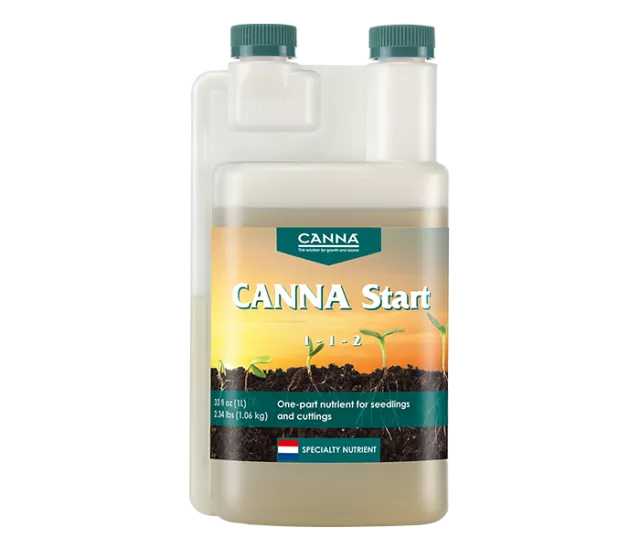
Canna Start: 10ml per gallon at pH 6.0
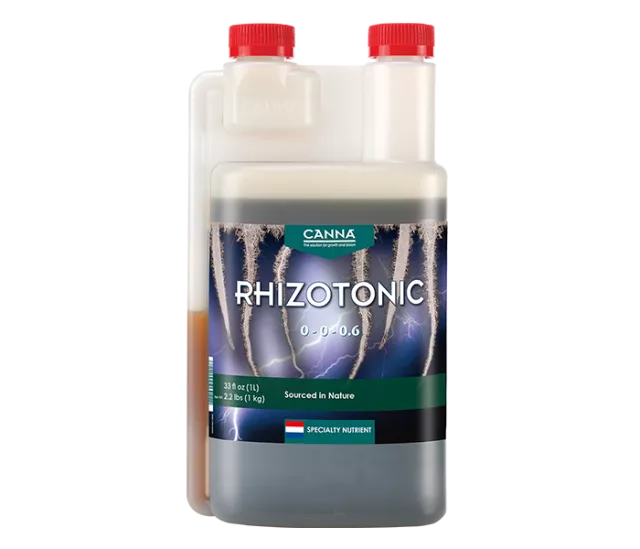
Canna Rhizotonic: 10ml per gallon at pH 6.0
BotaniCare HydroGuard: 2ml per gallon at pH 6.0
Note: pH 6.0 for this step, not 5.5. The two to four hour hydration period saturates your clones so they’re turgid and ready to root.
Step Two: Pest & Disease Protection Dunk
Before you go near the dip and grow, do this integrated pest management step. It’s your insurance policy.
Dunk Solution Recipe:
Choose one base solution and one pest control method. We recommend gentle, plant-safe options. Avoid harsh alcohol-based products like Green Cleaner, which are phytotoxic to delicate clones.
Base: 1 gallon pitcher with cloning solution (10ml Canna Start + 10ml Canna Rhizotonic + 2ml BotaniCare HydroGuard, pH 6.0)
Commercial Pest Control Options:
Trilogy neem oil by Certis Organics at 30ml per gallon
Venerate by Marrone Bioinnovations at 45ml per gallon
AzaGuard by BioSafe at 4ml per gallon
SNS 217 at 30ml per gallon
Sterilization Option (No Pest Control):
ZeroTol 2.0 by BioSafe Systems at 15ml per gallon. Use this if you are confident your environment is pest-free and want to focus purely on sterilizing the cut before plugging. Warning: ZeroTol 2.0 significantly lowers pH. After adding ZeroTol to your dunk solution, reset the pH back to 5.8 to 6.2 before dunking clones.
DIY Essential Oils Dunk (For Organic Growers):
Base: Same cloning solution (10ml Canna Start + 10ml Canna Rhizotonic + 2ml BotaniCare HydroGuard per gallon)
Add 1 teaspoon (5ml) per gallon of Doctor Bronner’s Castile soap or regular dish soap as an emulsifier
Add 2.5ml per gallon of clove oil
Add 2.5ml per gallon of lemongrass oil or peppermint oil
This blend handles spider mites, aphids, thrips, whiteflies, and other pests on clone material before plugging. Works well for full-year foliar sprays too. GreenHealth carries a full range of essential oils suitable for pest control and IPM programs, all available on Amazon.
Why these options work: They protect against pests, powdery mildew, and are antimicrobial—solid integrated pest management without harming delicate clone foliage. Note: Essential oils and neem can create a slight waxy coating on leaves—this is intentional for pest and disease protection at this vulnerable stage. If you prefer to skip the dunk, ensure your cloning environment is pristine and monitor closely for any signs of infection or pest pressure.
How to dunk: Grab all your clones in one fistful. Dunk them upside down into the solution, saturating foliage and the majority of the stem. Leave the bottom 10-15 percent of the stem out—you don’t want product on the open cut. Shake out vigorously, then return to the cup.
Step Three: Water Preparation
Before you soak any rockwool or prepare any solutions, dial in your water. This is foundational.
Water Temperature & Dissolved Oxygen
Water temperature directly impacts dissolved oxygen levels—warmer water holds less oxygen, cooler water holds more. Target range: 68 to 72 degrees Fahrenheit. This is easily achievable at home without expensive equipment.
How to chill your water: Freeze a water bottle or use blue ice packs. Drop the frozen bottle into your five-gallon bucket of water and let it sit until the temperature drops into the 68-72 degree window. Use a thermometer or a dual-purpose pH meter (most modern ones read temperature alongside pH and EC) to monitor. A Blue Lab pH Pen works great for this.
Water Filtration (Not Reverse Osmosis)
You do NOT need reverse osmosis water. RO systems are wasteful—you lose 1 to 3 gallons of water for every 1 gallon you keep, depending on your setup. Instead, use a simple KDF and carbon filter.
Why: KDF filters remove chlorine and chloramines, which is all you need for clone work. These filters are inexpensive (available on Amazon), hook up to standard garden hoses, and can be modified for indoor use. Look for options like Tall Boy, Big Boy, or two-stage pre-evolution filters—any KDF/sediment/carbon combo works.
Aeration & Dissolved Oxygen Saturation
Once your water is chilled to 68-72 degrees, aerate it to maximum dissolved oxygen saturation. Skip air stones—they harbor bad biology and are hard to sanitize.
Instead, use a Compost Tea Aerator: The BubbleSnake (from TeaLab, a compost tea brewing company). It’s half-inch PVC with an airline connector that sits at the bottom of your five-gallon bucket. Attach a small EcoPlus Eco Air Pumps and bubble for 15 minutes. This achieves maximum dissolved oxygen saturation—all you need.
Pro tip: Once your water is chilled and aerated, add your nutrients (10ml Canna Start + 10ml Canna Rhizotonic + 2ml BotaniCare HydroGuard per gallon) immediately before use. You now have high dissolved oxygen, optimal temperature, and a nutrient-rich solution ready for rockwool soaking and clone hydration.
Step Four: Rockwool Prep & Media
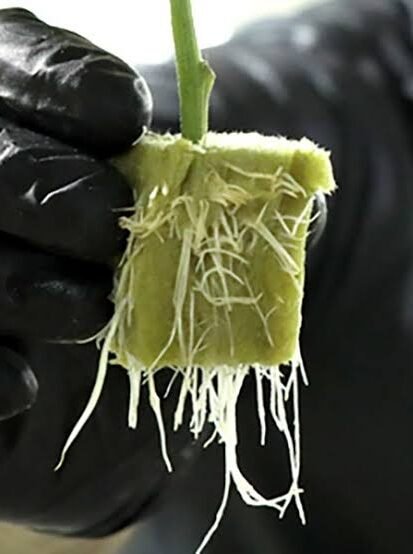
Media type can vary. We prefer 1.5 inch Rockwool micro cubes or microblocks. Other media works—this is just what we’ve dialed in.
Rockwool Soak Recipe:
Initial pH: 5.5 (brand new Rockwool has lime that brings it back up to 6.0-6.5, which is the target window)
Choose one solution: Canna Start 10ml per gallon at pH 5.5 OR Canna Rhizotonic 10ml per gallon at pH 5.5 with BotaniCare HydroGuard 2ml per gallon
Soak cubes to full saturation. You won’t need to re-saturate them for 5-7 days.
Pro tip: Use a checkerboard pattern in 50-cell trays. Populate only 25 cells instead of all 50—gives clones more space, better light penetration, better airflow, fewer microclimates inside the dome.
Step Five: Rooting Hormone & Plugging
We use Dip and Grow. Dilute it using the little vial that comes with it: Fill the vial to the concentrate line, top it off with clean water (KDF-filtered, distilled, or good quality drinking water) up to the 5x line, then dip each cutting’s stem into this solution.
Plugging in: Insert the bottom third of the stem into the pre-soaked Rockwool cube. Don’t bend the stem—if it bends, cut just above the bend and discard. A bent stem damages the clone and usually wilts within the first few days.
Step Six: Environmental Controls (Critical)
These numbers matter. We’ve tested them extensively.
Temperature
Optimal: 78-82 degrees F
Below 78 degrees F: Slows rooting time
Above 82 degrees F: Stresses clones and causes harm
Humidity
Target: 65-70 percent relative humidity
Lighting
Light cycle: 18 hours on, 6 hours off
PAR level: 100-125 PAR
Color spectrum: 5000-6000K (reduces stretching, keeps node spacing tight)
Single 40-watt LED shoplight: Centered over a 4-foot shelf—solid rooting time
Two 40-watt fixtures: Space them approximately 10 inches apart on an 18-inch wide shelf—reaches the upper 125 PAR limit
Why 18/6 over 24 hours: We tested this extensively. There’s no acceleration in rooting time or root density at 24 hours versus 18 hours. The 18/6 schedule saves 25 percent power, which makes the whole operation cheaper.
Airflow
Circulation in the room, not blowing directly on the clone rack
Think of it like a drying room—you want air moving, but not a wind tunnel
Step Seven: Dome Management (Days 1-7)
Initial setup (days 1-3): Dome on with both vents fully open from the start.
Day 3-4: Dislodge the dome. Slide it back about 1 inch or prop the corners up with pencils/chopsticks to create a gap. This allows more airflow and begins slowly reducing humidity.
Watch the clones for 1-2 hours after dislodging. If they start wilting (shock from humidity drop), put the dome back on fully, leave vents open, and let them acclimate longer. They’re telling you they’re still dependent on the high humidity.
Step Eight: Foliar Feeding (2-3 Times During Rooting)
Clones have no roots yet, so they can’t feed themselves. Foliar feeding is like an IV—it keeps them green and prevents chlorosis while they’re waiting to develop their own root system.
Foliar Spray Recipe:
Base solution: Same as your hydration soak (10ml Canna Start + 10ml Canna Rhizotonic + 2ml BotaniCare HydroGuard at pH 6.0)
NO neem oil in this spray—just the nutrients
Remove dome, fully saturate the foliage, let it dry
Why: Keeps clones green, prevents yellowing (chlorosis), maintains vigor
Step Nine: Dome Removal & Acclimation
If your room humidity is 65-70 percent: By day 5-6, attempt removing the dome completely. Foliar feed when you remove it (hydrates them for the transition). Watch for 1-2 hours as they dry off from the spray. If they stay perky with good leaf stance, dome stays off. If any wilting occurs, dome goes back on for another day. Benefit of early removal: Increased airflow, eliminates botrytis and leaf mold.
If your room humidity is below 65 percent: Keep the dome on longer (day 7-10). You’re more dependent on it for humidity control, so acclimation will be slower.
Optional: The Clone Tent Setup
If you have the space and want to dial in perfect conditions, this is the setup we run in our nursery:
4×8 Grow Tent Configuration:
Two 4-foot wire racks (18 inches deep, 48 inches wide)
Ultrasonic humidifier with built-in humidistat (set to 65-70 percent)
Small inline exhaust fan on a 15-minute timer: 15 minutes on, 45 minutes off per hour. This purges stale air, humidity, and heat systematically and brings in fresh air continuously.
Space heater (if you’re in a cold climate to maintain 78-82 degrees F)
Why this works: The humidifier maintains stable 65-70 percent humidity. The exhaust fan on a 15-minute cycle removes old air and excess humidity, then the humidifier keeps it steady again. This eliminates the need to manually manage domes and gives both rooting and hardened-off clones an ideal environment.
Alternative: Basic Humidifier + Titan Controller
If your humidifier doesn’t have a built-in humidistat, use the Titan Controller EOS 2 (digital humidity controller). Set your desired humidity (e.g., 65 percent), and the Titan clicks the humidifier on when humidity drops and off when it reaches about 5 percent above your set point. Still pair this with the exhaust fan on a timer for air circulation.
The Dome of Death Warning
A lot of amateur cloners fail here: they close the dome vents fully, thinking clones need 100 percent humidity. This is backwards.
What happens: Closed vents plus dome equals suffocation and stagnant air, which equals slow rooting and creates perfect conditions for botrytis and leaf mold to spread through your entire tray. You’ll lose clones unnecessarily.
The truth: Clones do not need 100 percent humidity to root. 65-70 percent humidity with fresh air circulation is all they need. Keep those vents open.
Final Thoughts
This is our standard operating procedure for cannabis cloning. We’ve tested the variables extensively, and these parameters work. That said, your environment, your genetics, your water quality—all of it is different. Use this as a roadmap, adjust as needed, and keep notes on what works for you. Every grower’s way is valid. This is just ours.